Our Health Library information does not replace the advice of a doctor. Please be advised that this information is made available to assist our patients to learn more about their health. Our providers may not see and/or treat all topics found herein.
Exercises After Breast Cancer Surgery
Overview
After breast cancer surgery, you may feel some pain going down your arm. Your shoulder and arm may be stiff and hard to move. You may also have some loss of feeling there.
Take good care of your arm on the side of your surgery. Your doctor or physical therapist can teach you arm exercises that will help you move your arm as you always have. But be careful not to overuse your arm. For example, do not lift anything heavy with your arm until your doctor says it is okay. Some basic exercises, such as shoulder shrugs and elbow circles, will help you start moving your arm.
How do you do the exercises?
How to stay safe
- Do not start to exercise until your doctor says it is okay. This is especially true if you have a drain or had a breast reconstruction. Ask when it is safe for you to start doing each exercise.
- If you are not sure how to do an exercise, don't start it until your doctor or physical therapist shows you exactly how to do it.
- Stop exercising if your arm or chest area hurts or begins to swell. Talk with your doctor about your symptoms. Also call your doctor if you have problems doing an exercise or it hurts.
- Wear loose-fitting clothing while you do your exercises.
- Use your arm for your usual activities, such as brushing your teeth and hair.
How to do the exercises
Belly breathing (diaphragmatic breathing)
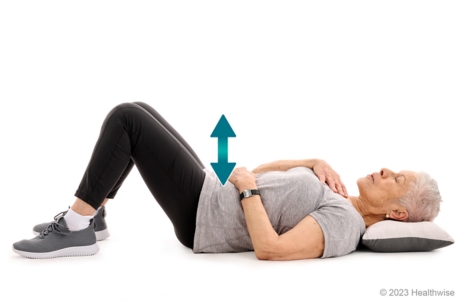
- Lie on your back. You can put a small rolled towel behind your neck or use a pillow for comfort. Or you can prop yourself up on several pillows.
- Put one hand on your belly and the other on your chest.
- Breathe in slowly through your nose. When you breathe in, push your belly out as far as possible. You should feel the hand on your belly move out, while the hand on your chest does not move.
- Breathe out slowly through your mouth. When you breathe out, you should feel the hand on your belly move in.
Practice this breathing method 3 or 4 times a day for about 10 minutes each time.
When you can do this type of breathing well while lying down, learn to do it while sitting or standing.
Shoulder shrug
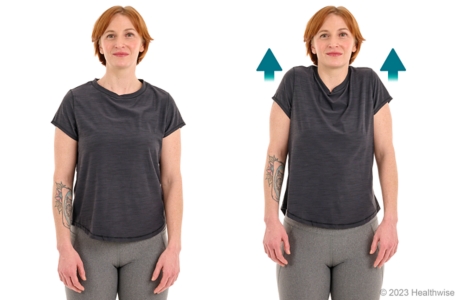
- Sit or stand up straight. Relax your arms, and keep them relaxed.
- Shrug your shoulders toward your ears. Relax and let your shoulders settle back down.
- Repeat 2 to 4 times.
Shoulder roll
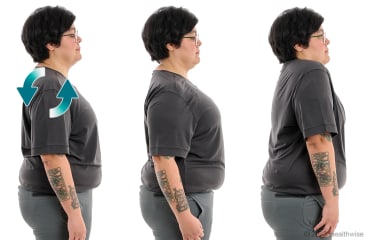
- Sit or stand up straight with your chin slightly tucked.
- Keep your arms relaxed. All motion will be in your shoulders.
- Roll your shoulders up, then back, then down, then forward in a smooth, circular motion.
- Then go the other direction. Press your shoulders down, then back, then up, and then forward in a smooth, circular motion.
- Repeat at least 2 to 4 times in each direction.
Arm sweep
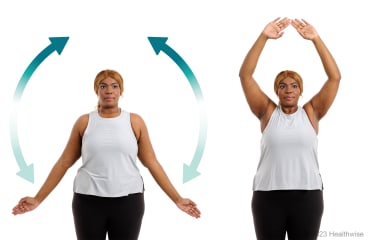
- Sit or stand tall, with your arms at your sides and your palms facing forward.
- Sweep both arms up to the sides as high as you can. Try not to shrug your shoulders.
- Slowly sweep your arms back down to your sides.
- Repeat 2 to 4 times.
Overhead reach
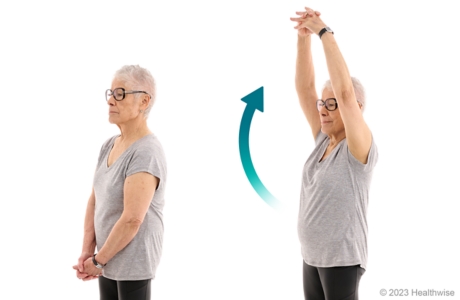
- Stand or sit up straight. Keep your elbows straight and clasp your hands together.
- Raise your arms straight up toward the ceiling. Try not to shrug your shoulders.
- Slowly lower your arms to the starting position.
- Repeat 2 to 4 times.
Shoulder-blade squeeze
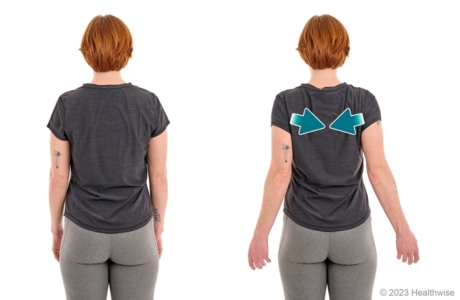
- Sit or stand up straight with your arms at your sides.
- Keep your shoulders relaxed and down, not shrugged.
- Squeeze your shoulder blades down and together.
- Hold for about 6 seconds, then relax.
- Repeat 2 to 4 times.
Wall climb to the front
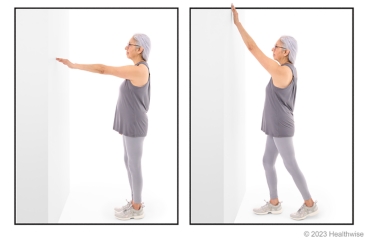
- Face a wall, standing so your fingers can just touch it.
- Keeping your shoulder down (don't shrug), walk the fingers of your affected arm up the wall as high as pain permits.
- Hold that position for at least a few seconds.
- Slowly walk your fingers back down.
- Repeat 2 to 4 times. Try to reach a little higher each time. When you are able to reach higher, you can take a step toward the wall as you walk your fingers up, then step back as you walk your fingers back down.
Elbow circles
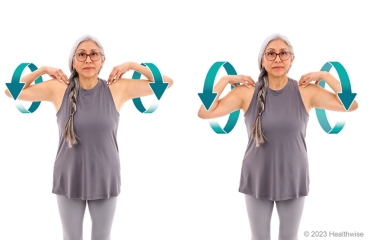
- Sit or stand with your feet slightly apart.
- Put your right hand on your right shoulder, and your left hand on your left shoulder. Your elbows should be at shoulder level and pointing out.
- Make about 8 circles with your elbows. Start with a small circle and make each circle a little bigger.
- Change direction and repeat your circles.
- Repeat 2 to 4 times.
Credits
Current as of: October 25, 2024
Author: Ignite Healthwise, LLC Staff
Clinical Review Board
All Ignite Healthwise, LLC education is reviewed by a team that includes physicians, nurses, advanced practitioners, registered dieticians, and other healthcare professionals.
Current as of: October 25, 2024
Author: Ignite Healthwise, LLC Staff
Clinical Review Board
All Ignite Healthwise, LLC education is reviewed by a team that includes physicians, nurses, advanced practitioners, registered dieticians, and other healthcare professionals.
This information does not replace the advice of a doctor. Ignite Healthwise, LLC disclaims any warranty or liability for your use of this information. Your use of this information means that you agree to the Terms of Use and Privacy Policy. Learn how we develop our content.
To learn more about Ignite Healthwise, LLC, visit webmdignite.com.
© 2024-2025 Ignite Healthwise, LLC.


